MarsProxies and Ghost Browser: Integration Tutorial

Ghost Browser is a browser focused on privacy and productivity, aimed at professionals. These include social media managers, developers, QA testers, SEO experts, and anyone else who needs to use multiple accounts on a website from a single window.
In other words, it offers everything you’d expect from an anti-detect browser, with some unique perks. Just like all anti-detect or privacy-focused browsers, it’s essential to pair Ghost Browser with reliable proxies.
Today, we’ll look into what Ghost Browser has to offer, and explain how to use it with proxies.
Ghost Browser Features Overview
Ghost Browser is based on Chromium, which means it supports all Chrome extensions and offers a familiar interface. More importantly, it can sync cookies and history with Chrome, and you also get access to Chrome Developer Tools. According to the developers, it only takes two minutes to get Ghost Browser fully synced with Chrome.
The browser enables you to run different sessions on a single website from one browser window. You can also save sessions, group them into projects, and more. Each session has its own cookies and other data completely isolated from the others.
It also has great team-focused features, enabling data sync, sharing workspaces, identities, cookies, and proxy settings. Finally, it’s important that Ghost Browser is available for Windows, MacOS, and Linux.
What Does MarsProxies Offer
Anyone who needs to manage multiple accounts at once knows it’s not possible without reliable proxies. Pairing your identities and workspaces with authentic IP addresses ensures they all look genuine and neutralizes the chances of detection, blocks, geo-restrictions, and all other IP-based limitations.
Here’s what you get with MarsProxies residential proxies:
- A global pool of over one million real residential IPs in 190+ countries
- Non-expiring traffic and no contract obligations
- Country, state, and city-level geo-targeting options
- Support for HTTP/HTTPS and SOCKS5 with all proxies
- Custom rotation and sticky session options (from one second up to a week)
- Great pricing and excellent bulk discounts
How to Use MarsProxies With Ghost Browser
Adding your proxies to Ghost Browser doesn’t differ much from other anti-detect browsers we covered before. Still, it’s a bit more versatile than we’re generally used to. You have three options here:
- Add a single proxy
- Add proxies in bulk from a CSV file
- Manage proxies with a Chrome extension
While our extension for Chrome is quite useful, we’d suggest adding proxies directly to Ghost Browser for easier management.
How to Add a Single Proxy
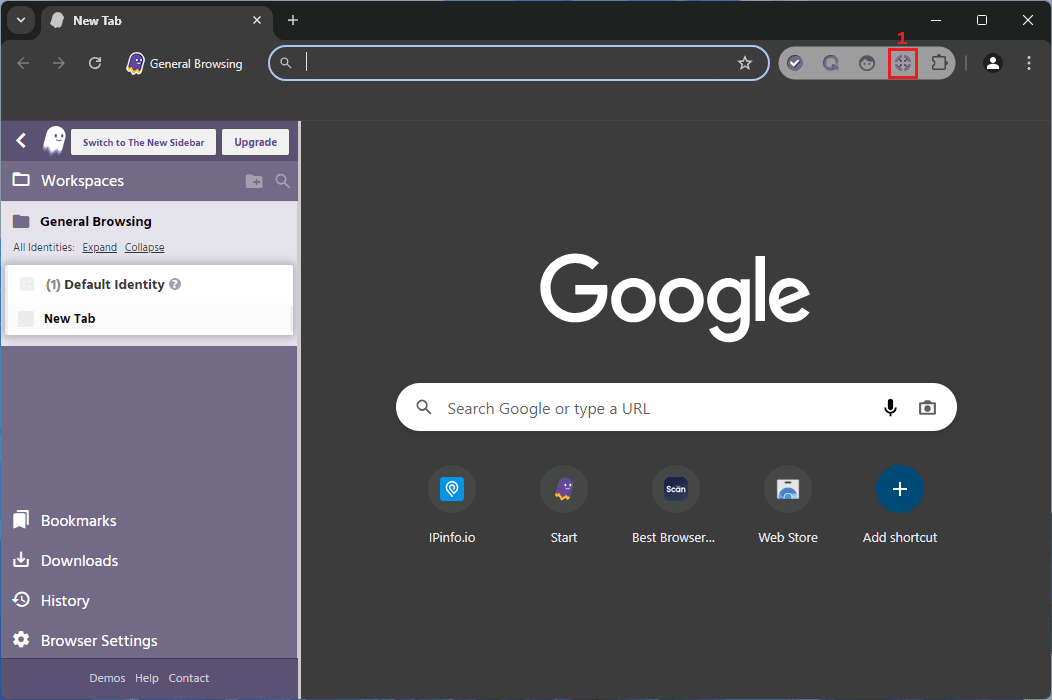
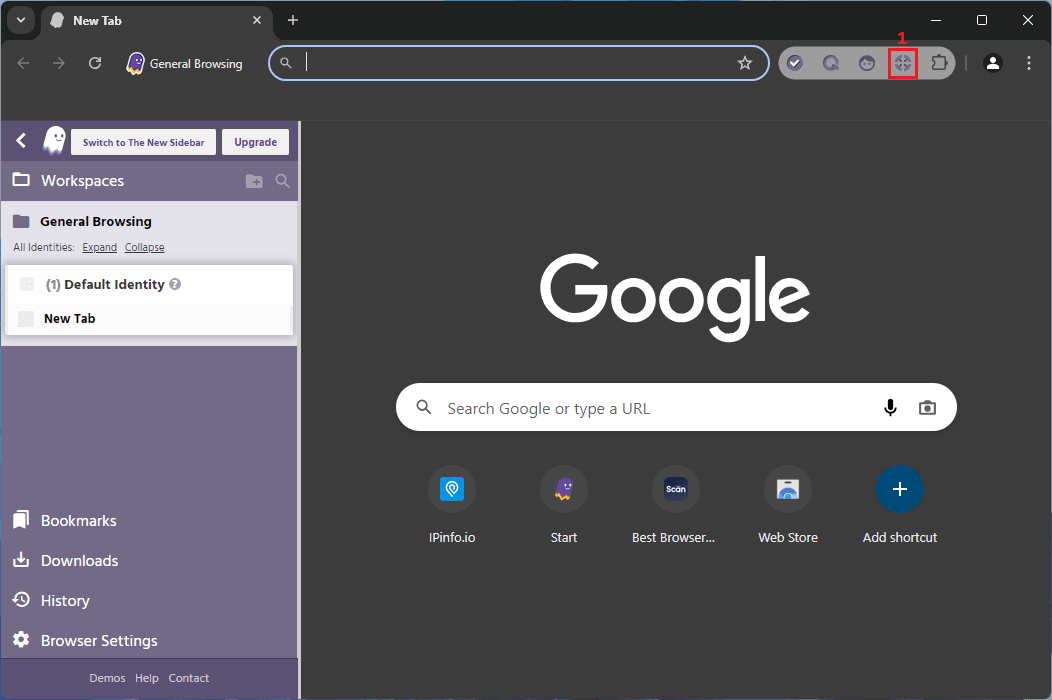
1. Launch Ghost Browser and click the Ghost Proxy Control (1) icon.
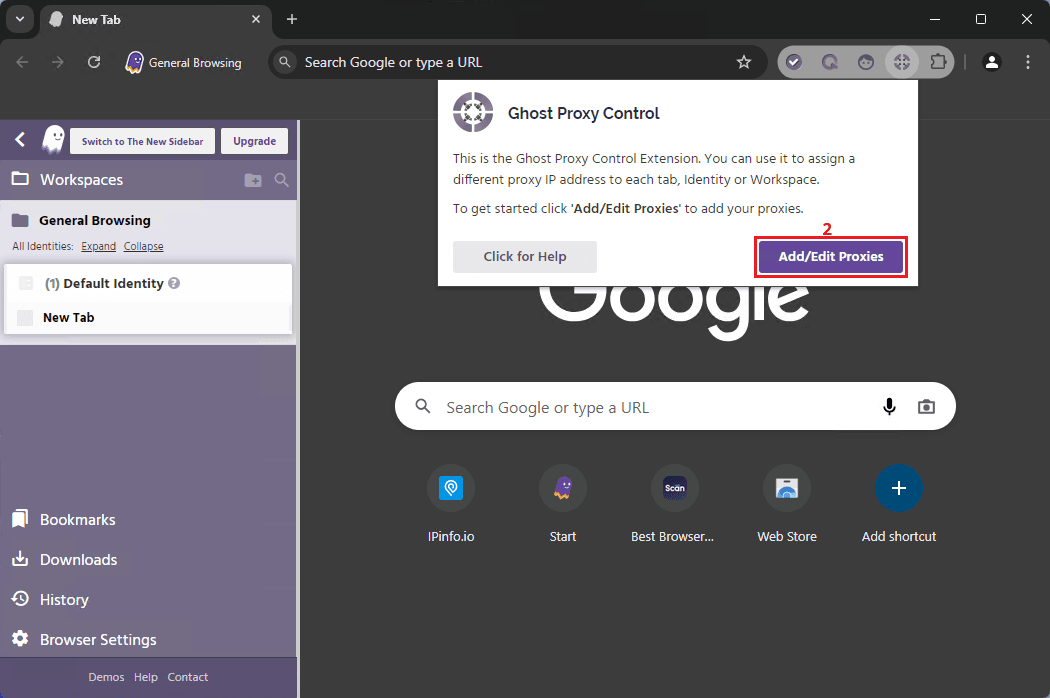
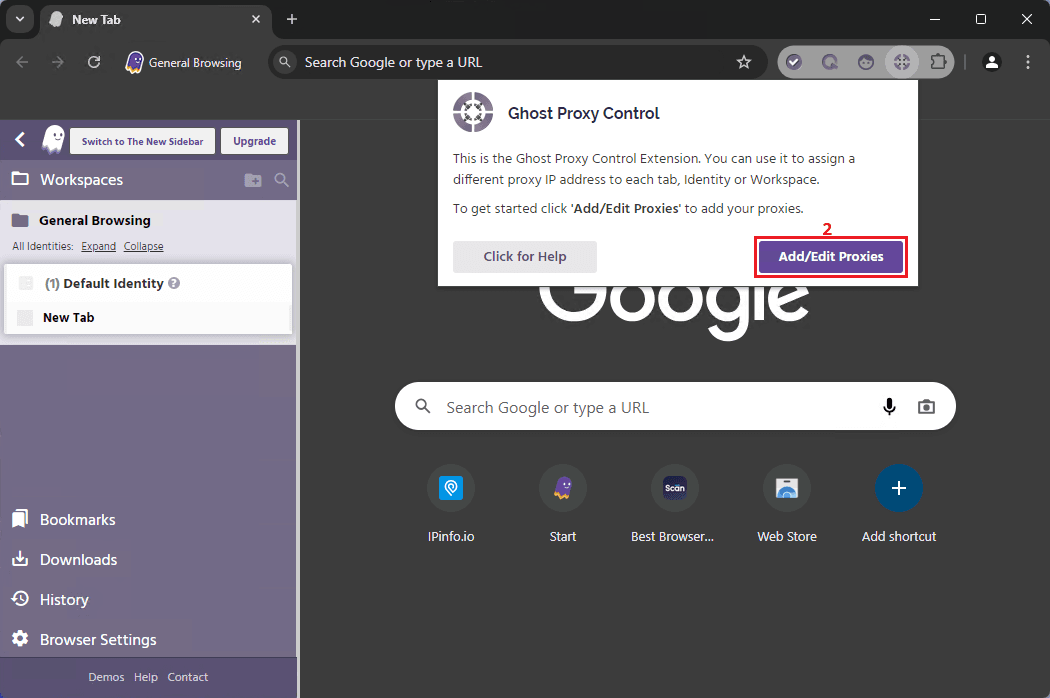
2. Click the Add/Edit proxies (2) button.
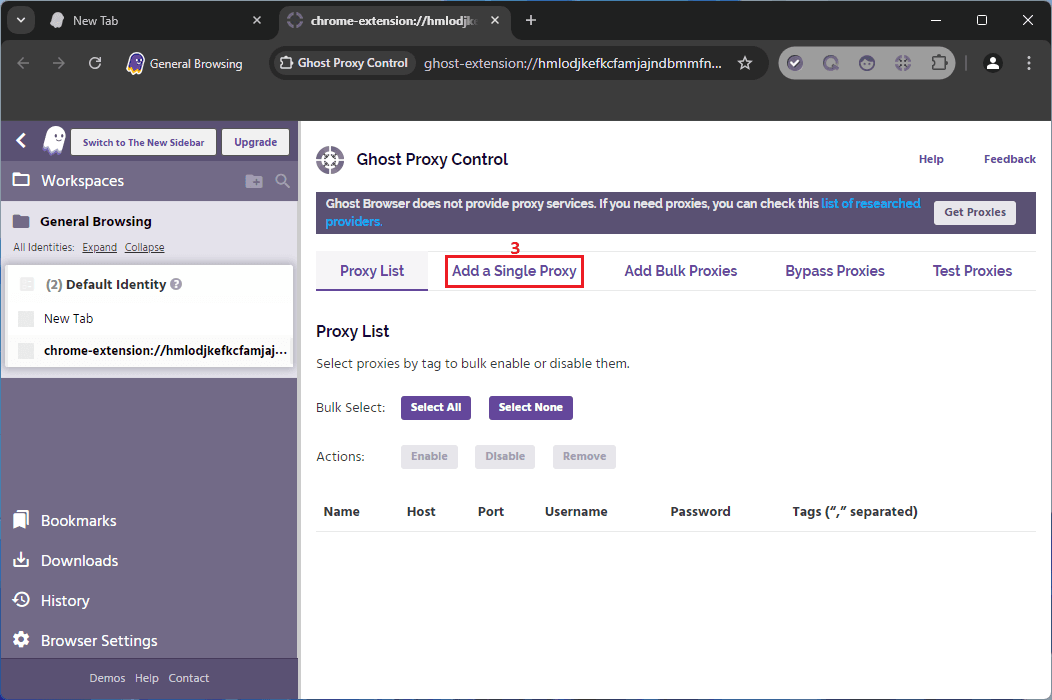
3. Click on the Add a Single Proxy (3) tab.
4. Visit the MarsProxies dashboard and configure your proxies. We’ll use proxies from Ohio, US (4) with randomized IPs (5) that change on each request, and HTTP/HTTPS as our proxy type (6).
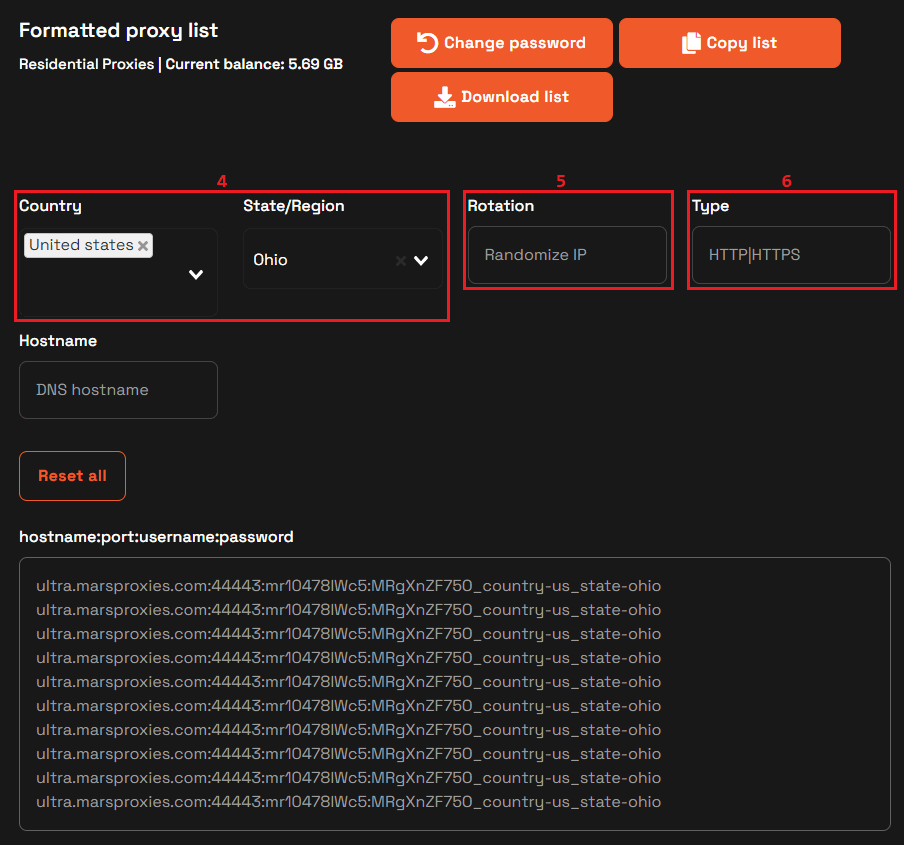
5. Each string in the hostname:port:username:password field is a unique set of credentials in this format. Copy each part (hostname, port, username, and password) into the appropriate fields (7) in Ghost Browser. Click the Add Proxy (8) button when done.
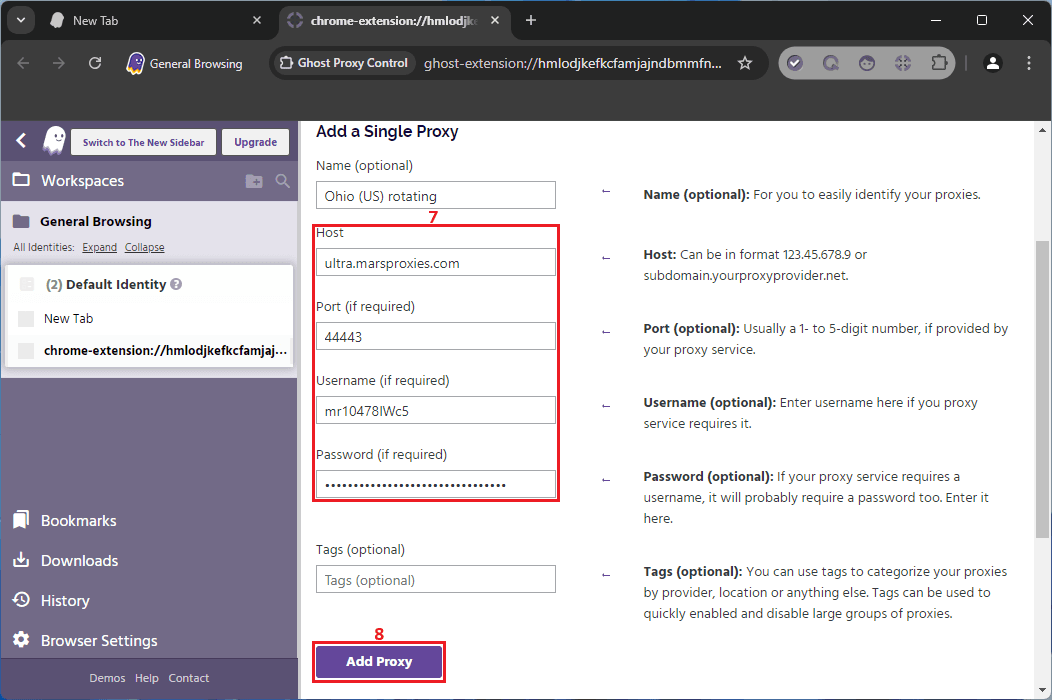
6. The proxy will show up in your proxy list (9).
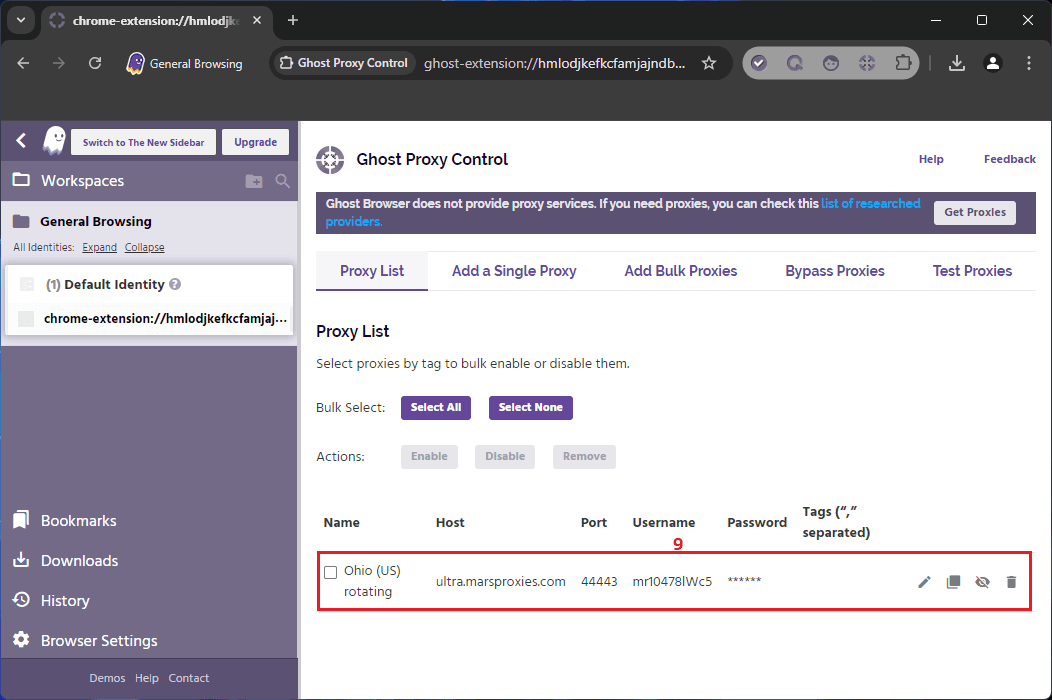
7. Create a temporary identity and click the Ghost Proxy Control (10) icon.
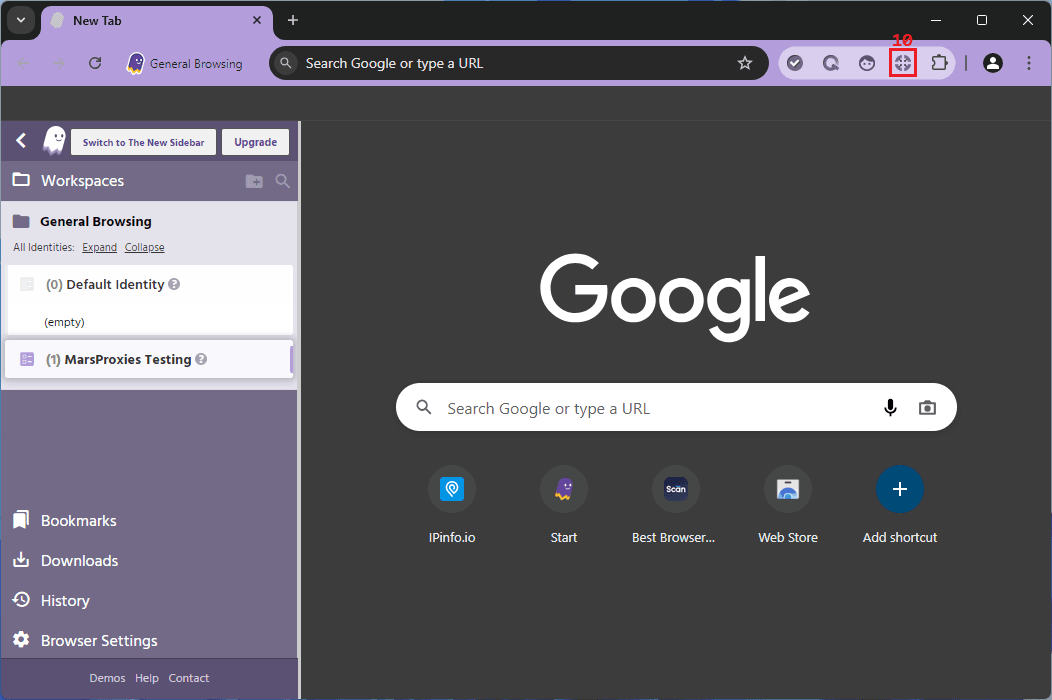
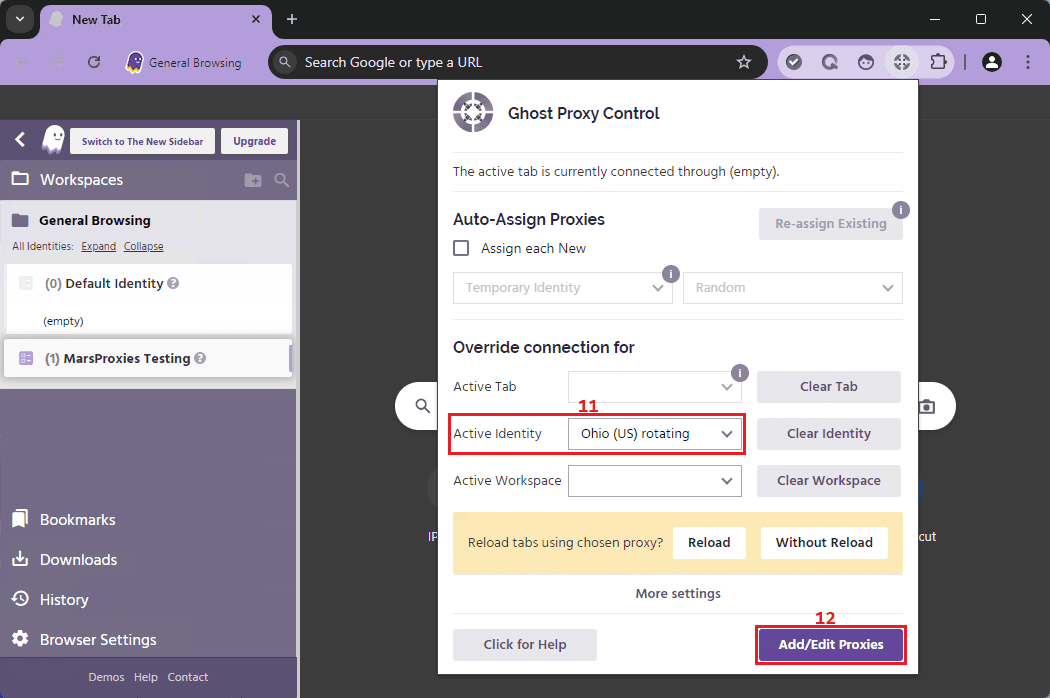
8. Select your proxy for the active identity (11) and click the Reload (12) button.
9. Visit IPInfo or any other similar website and check if your proxy works correctly.
Everything looks fine, so you can assign your proxy to other identities as needed.
How to Add Proxies in Bulk
1. Launch Ghost Browser and click the Ghost Proxy Control (1) icon.

2. Click the Add/Edit proxies (2) button.
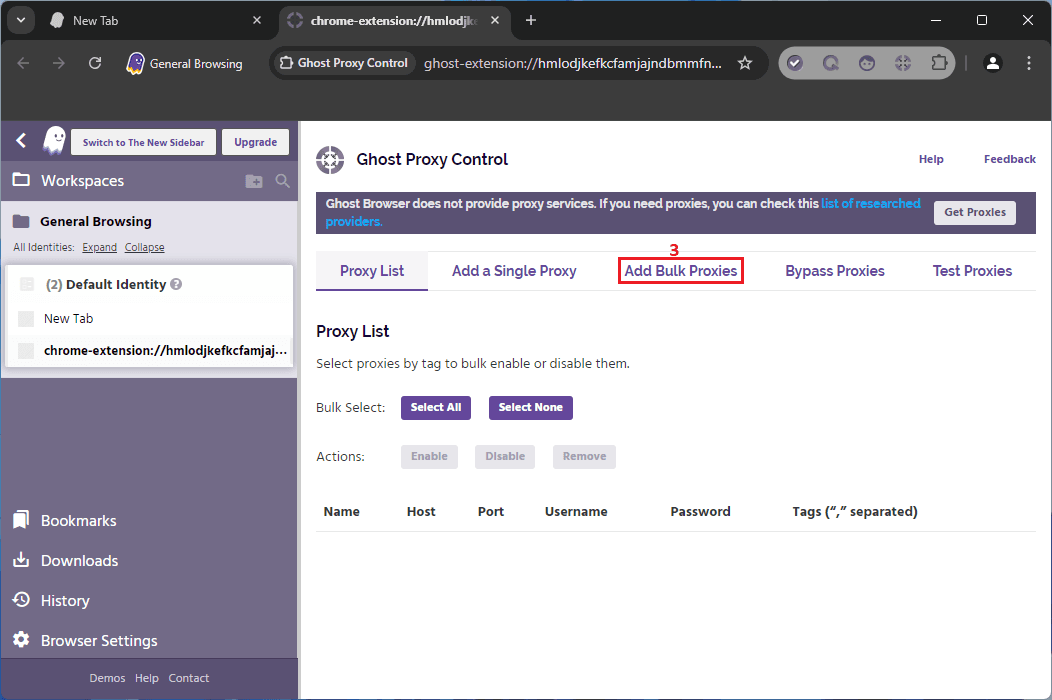
3. This time, click on the Add Bulk Proxies (3) tab.
4. If you prefer not to create your own CSV file, click the Export Sample File (4) button.
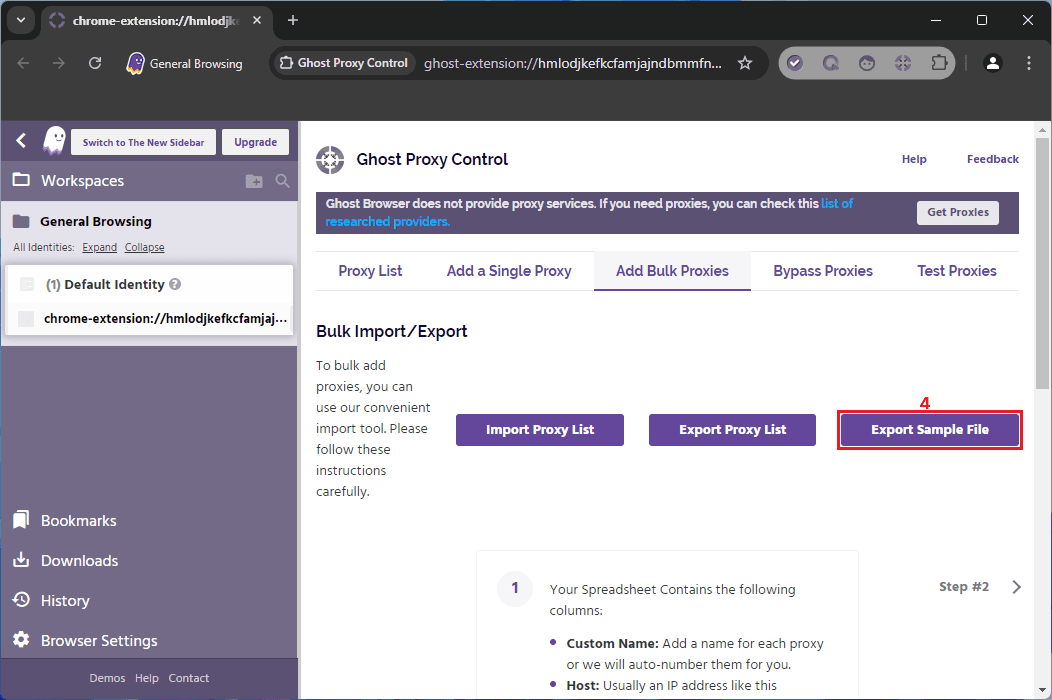
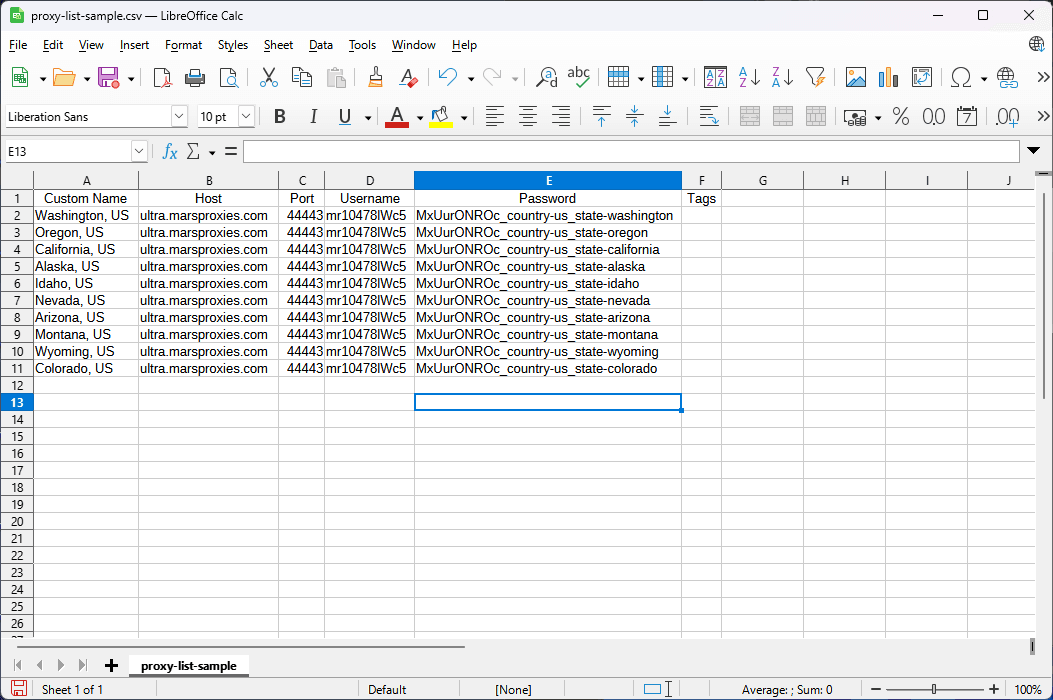
5. Open the sample CSV file, add your proxy credentials from the MarsProxies dashboard, and save it.
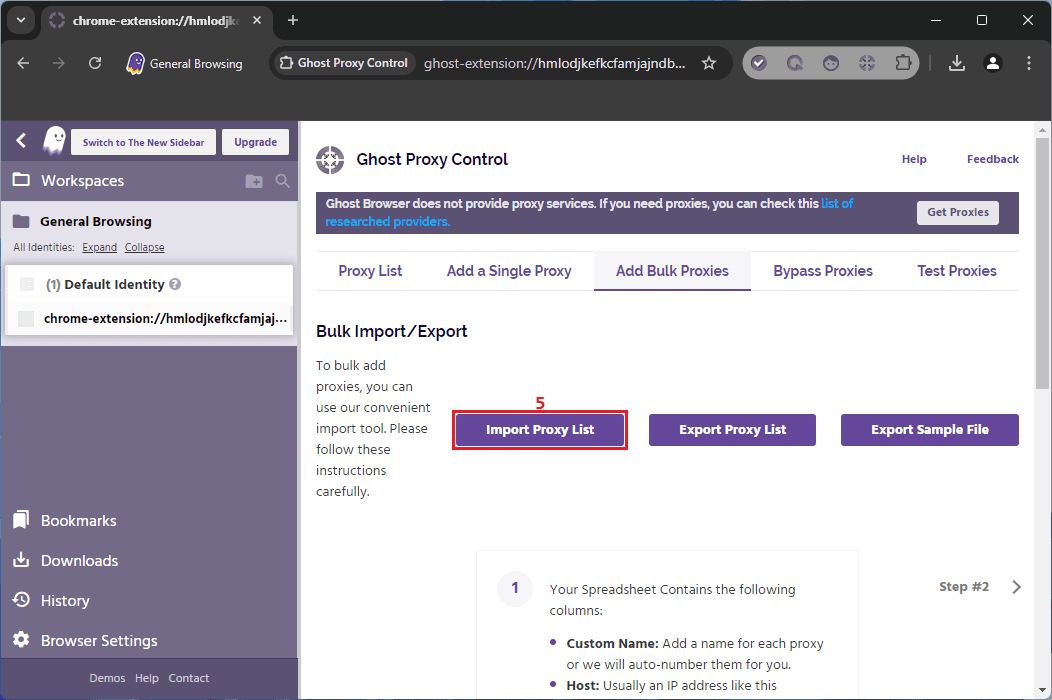
6. Return to Ghost Browser and click the Import Proxy List (5) button.
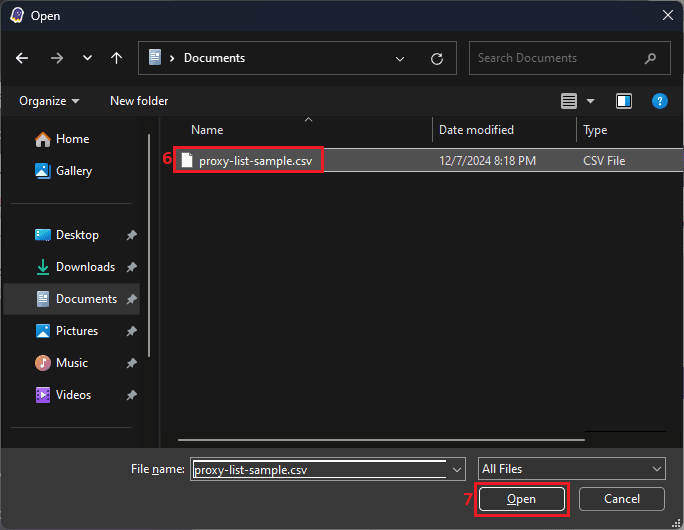
7. Find the location of your list file, select it (6), and click the Open (7) button.
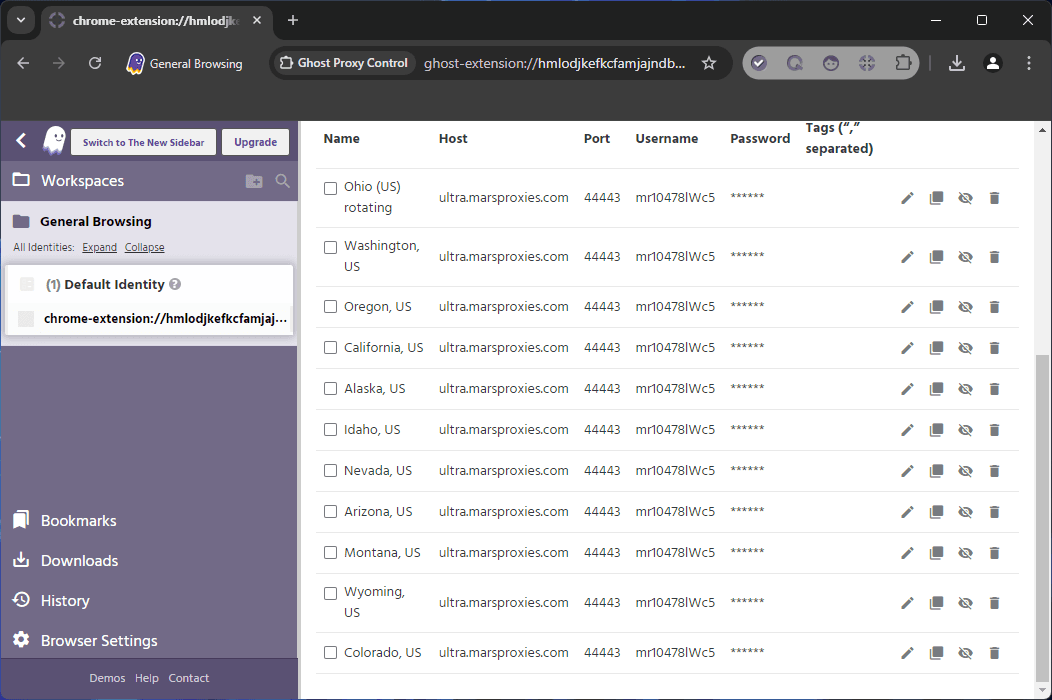
8. Your proxies will appear in your proxy list, and you can assign them to your identities as we described above.
Final Thoughts
Ghost Browser has a lot to offer. The free version supports up to three identities, which is great for those who just need to separate different projects. It’s also more than enough for basic testing. Either way, we strongly recommend trying it out - it just might be the perfect solution for your needs.


